

Wildernesses are regions on the map, which improves production of the relevant resource when conquered. The regions vary in level from 1 to 10. Each level increases your base production by 5%. In wilderness regions from levels 5 up to 10, you may find crests.
The level of the region determines how hard the region is to conquer and, therefore, how many Troops you will need. Before trying to conquer the region, you can scout to get an idea of what kind of troops you will need.
The level of the region determines how hard the region is to conquer and, therefore, how many Troops you will need. Before trying to conquer the region, you can scout to get an idea of what kind of troops you will need.
PLAINS
- Cities are built on Plains.
- Does not give any bonus to resource production.
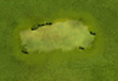
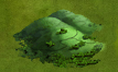
GRASSLAND
- Grasslands improve food production.
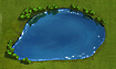
LAKES
- Lakes improve food production.
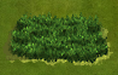
WOODS
- Woods improve wood production
HILLS
- Hills improve stone production.
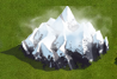
MOUNTAINS
- Mountains improve ore production

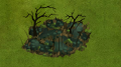
DARK FOREST
- Dark forests are special regions inhabited by unique creatures.
- When defeated, they give aetherstones and transform back to bogs.
- Click HERE for dark forest guide.
BOGS
- Bogs are impenetrable wilds.
- They cannot be conquered or attacked.
- Bogs transform into dark forests.
Players have determined that the number of troops and defense units (traps) in an unoccupied wilderness is fixed and are listed below. This is true for Plains, Grasslands, Lakes, Hills and Mountains, BUT NOT FOR DARK FOREST. Please refer to Dark Forest Troop Guide for more information.
TRAPS
LEVEL 1 - 0
LEVEL 2 - 5
LEVEL 3 - 10
LEVEL 4 - 20
LEVEL 5 - 50
LEVEL 6 - 100
LEVEL 7 - 150
LEVEL 8 - 300
LEVEL 9 - 600
LEVEL 10 - 1,200
Traps and troops regenerate at a rate of 10% every 5 minutes. Hence, they are fully regenerated (100%) with resources, traps and troops after 50 minutes.
CONQUERING WILDERNESS
Multi-wave Attacks
To save resources, attacks are usually sent in two waves. The first wave, or suicide wave, is made up of cheaper troops like Militiamen or Supply Troops to clear Traps. The number of troops in the suicide wave is equal to the number of traps.
Make sure your Rally Point is at least level 2 to send two attacks from the same location. You must also have at least 2 idle Knights. Time your waves so that the second wave hits almost immediately after the first wave. The longer the delay, the more traps can regenerate and kill troops in the second wave. Remember, traps and troops regenerate at a rate of 10% every 5 minutes. So it's advisable to send the second wave within as little as 15 seconds after the first.
Timing Waves
- Include 1 of the slowest unit in your second wave in the first wave. Then, simply send the second wave immediately after.
- To avoid losing that 1 slowest unit, send your slower wave (probably second wave) first. Then, carefully monitor your "Troop Activity" tab and time your suicide wave to hit first.
It is possible to completely overwhelm any level wilderness to achieve nearly zero loss of troops. The table below shows the troops needed to defeat the different levels.
Note that the these numbers are best estimates and not absolutes, but have been shown to work for most players. There are many factors that determine the battle, including the combat skill of your knight and your research levels. You can also enhance your troops by applying items, such as: Blood Lust, Blood Frenzy, Barkskin and Stoneskin.
Note that the these numbers are best estimates and not absolutes, but have been shown to work for most players. There are many factors that determine the battle, including the combat skill of your knight and your research levels. You can also enhance your troops by applying items, such as: Blood Lust, Blood Frenzy, Barkskin and Stoneskin.
LEVEL 1
LEVEL 2
LEVEL 3
LEVEL 4
LEVEL 5 ( atleast level 6 Fletching )
LEVEL 6 ( atleast level 7 Fletching )
LEVEL 7 ( atleast level 7 or 8 Fletching )
LEVEL 8 ( atleast level 9 Fletching )
LEVEL 9 ( atleast level 9 Fletching )
LEVEL 10 ( atleast level 9 Fletching )
- ONE WAVE OF THE FOLLOWING : 160 militiamen OR 60 swordsmen/pikemen OR 80 archers
LEVEL 2
- WAVE 1 : 5 militiamen
- WAVE 2 : 130 archers
LEVEL 3
- WAVE 1 : 10 militiamen
- WAVE 2 : 520 archers
LEVEL 4
- WAVE 1 : 20 militiamen
- WAVE 2 : 1,600 archers
LEVEL 5 ( atleast level 6 Fletching )
- WAVE 1 : 50 militiamen
- WAVE 2 : 2,200 archers
LEVEL 6 ( atleast level 7 Fletching )
- WAVE 1 : 100 militiamen
- WAVE 2 : 3,000 archers
LEVEL 7 ( atleast level 7 or 8 Fletching )
- WAVE 1 : 150 militiamen
- WAVE 2 : 8,000 archers
LEVEL 8 ( atleast level 9 Fletching )
- WAVE 1 : 299 militiamen + 1 ballista
- WAVE 2 : 10,000 archers + 1000 ballistae OR 3,300 ballistae
LEVEL 9 ( atleast level 9 Fletching )
- WAVE 1 : 599 militiamen + 1 ballista
- WAVE 2 : 13,137archers + 1,700 ballistae OR 5,500 ballistae
LEVEL 10 ( atleast level 9 Fletching )
- WAVE 1 : 1,199 militiamen + 1 catapult
- WAVE 2 : 12,500 catapults
OR
Level 1 Wilderness - 50 Archers
Level 2 Wilderness - 5 mm, 1 mm + 100 Archers.
Level 3 Wilderness - 10 mm, 1 mm + 260 Archers.
Level 4 Wilderness - 20 mm, 1 mm + 650 Archers.
Level 5 Wilderness
- 50 mm, 1 mm + 1,500 Archers (Level 6 Fletching) OR 2500 Archers.
Level 6 Wilderness
- 100 mm, 1 mm + 3,500 Archers (Level 7 Fletching) OR 5000 Archers.
Level 7 Wilderness
- 150 mm, 1 mm + 7,500 Archers (Level 8 Fletching) OR 12,000 Archers.
Level 8 Wilderness
- 299 mm + 1 Ballista, 2 - 10000 Archers + 800 Ballistas (lvl 9 Fletching)
Level 9 Wilderness
- 599 mm + 1 Ballista, 2 - 13000 Archers + 1200 Ballistas (lvl 9 Fletching)
Level 10 Wilderness
- 1200 mm, 45,000 Archers + 45,000 Ballistas (lvl 9 Fletching)
NOTE:
- In a city, the level of your castle determines how many wilderness you can conquer/own. For example : level 9 castle = 9 wilderness / level 5 castle = 5 wilderness.
- The level of your castle does not affect the level of wilderness you can own ( level 1 castle can have a level 9 or 10 wilderness) .
- If you successfully conquer the Wilderness, your surviving troops will remain encamped there until you recall them.
- All conquered Wildernesses will be listed in the Castle (OVERVIEW) under the Wilderness tab.
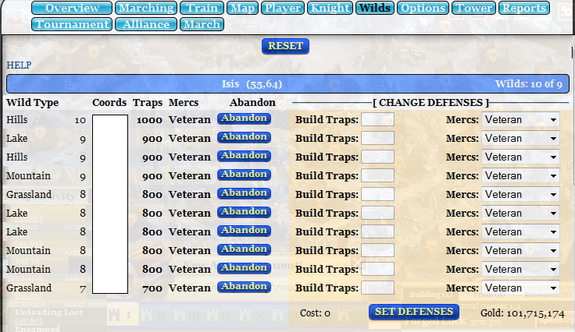
- Wildernesses that have been conquered can be defended with reinforced troops from your City or by building Traps and hiring Mercenaries to help protect them.
SETTING WILD DEFENSES ON THE TOOLS

|

|

|
